THOUSANDS OF FREE BLOGGER TEMPLATES

Tuesday, March 29, 2011

Payton's 3rd Birthday Party

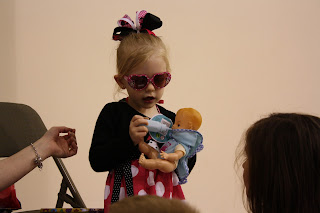
Well, we did it.  Another successful birthday party.  My baby girl turned 3 and I managed not to shed a tear.  This birthday has been very difficult for me.  She's not a baby anymore and that means I don't have any babies anymore.  Never mind the fact that I just returned from a trip to St. Louis with three of my best friends since middle school to celebrate our 30th birthday this year.  All the sudden I feel like my life is slipping away.........OK enough about that. 

I decided that I have been working on this party for about 2 months and people may like for me to compile a few ideas about having a Minnie Mouse party and where those ideas come from.  And in the meantime I get to show off my beautiful birthday girl!


The Invitation:  I created these on my own.  Tutuorial can be found here.

Then we have the birthday dress.  Much time was spent searching for the perfect Minnie Mouse dress.  And I finally found what I wanted at Angela's SugarnSpice Boutique.


I cut out Minnie Mouse heads, and until this very moment I didn't realize that I forgot to attach the bows  (oopsie!), using my Silhouette.  You can also see how to get the Waltograph font under the invitation post.  There was more food involved, it just hadn't been brought out yet:)

Hot Dog, Hot Dog, Hot Diggity Dog

You can't have a Minnie Mouse Birthday Party without HOT DOGS!!  And check out the centerpiece.  You can find out how to make them here. (or buy them on my esty site soon!)

I made the cake.  I do have a ball cake pan which would have worked the same IF it weren't in storage along with the rest of my life until my house is finished!  So instead I used a pyrex bowl.  Instructions are all over the internet.  The key is to decrease temperature by 50 degrees because the outside will get dry while the inside is still cooking.  The bottom part along with the ears and bows are made out of fondant.  I obviously iced the head, poorly I might add.  But guess what??  The kids thought it was great!  Oh, and what about those little Minnie & Mickey figurines?  Payton got those as a Christmas present and we got to paint them together.  Too cute:)
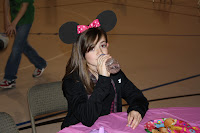
 

Find out how to make these adorable ears here.  Also see my goodie bags that I made using my Silhoutte.


GAMES
 
Pin the bow on Minnie Mouse.  I cut Minnie's head from cardboard and covered it with black tissue paper.  I even found a minnie mouse bandana at Hobby Lobby.


Musical Chairs:  You can use a Mickey Mouse Clubhouse CD or any child hood music. 


We also played Minnie Mouse Says, just like Simon Says.  I got $1 prizes at the Dollar Tree and the kids LOVED them.


I made the Minnie Mouse Pinata and you can find out here.


And Finally.....Another picture of my Birthday Girl!
Happy 3rd Birthday Payton!  Mommy Loves You!


Here are some sites that I used during my preparation for this party:

Happy Crafting:)

Linked To:

Friday, March 25, 2011

Minnie Mouse Pinata

Oh, it's been a while since my last post.  I don't really know what I've been up to, but I've been busy:)  Well the big party is this weekend!!  My baby girl is turning 3.  I'm very excited and very sad:(  My babies are growing up and WAY too quick.


So the last project is a Minnie Mouse Pinata.  I got the idea from here . 

Step One:          I used a pyrex bowl to make minnie's head and a smaller bowl for the ears,  just slightly overlapping the ears.


Step Two:  Cut them out:)

Step Three:  Cardboard can be rounded out as such, so that it can be bent around the Minnie Head.


Step Four:     Then I hot glued the edging to one piece of the Minnie Head and also hot glued a string inside.  Notice that the top is not fully closed.  This is so that you can put your treats inside:)


Step Five:  On the bottom I left a whole that looks like this for the treats to fall out of.  But then I covered the entire thing with black tissue paper, so that you can't see the box or the whole.  When the little ones poke through the tissue paper, the surprises will come out!!


Step Six:  Use paper streamers to style it up a little:) Then just put the junk in the hole at the top and hang it up.

Look back this weekend for a minnie mouse cake and a birthday party recap!


Happy Crafting:)

OHH, & GO UK!!!!!!!


Linked To:

Photobucket UndertheTableandDreaming
The Girl CreativeMakingCreations by KaraNightOwlCrafting

Sunday, March 6, 2011

Minnie Mouse Centerpieces

Besides my part time job and family responsibilities I have been SUPER busy in the last couple of weeks fulfilling minnie mouse orders on my etsy site.  I had planned on being done preparing for my daughters party way ahead of time.  But I loved my invitations so much that I thought everyone else would too.  And they did.  So I had about 200 of those to make and mail out.  Then I thought, well these minnie mouse headbands are easy to make I bet people will like them too.  And they did.  So I had about 100 of those to make and mail out.  Might I add, that when 10 seem like a really easy project, 100 is not necessarily that easy.  And I have made nothing but the invites for Payton's party. WHY do I do that to myself??!?
Anyway, this week I wanted to get started on a new craft to link up with.  So I got this inspiration from Heavenly Blooms.  It is a minnie mouse centerpiece:)

Supplies:
2 small-medium styrofoam balls    $1.00 Dollar Tree
1 medium-large styrofoam balls    $3.25  Walmart
Black Paint
Pink & white polka dotted ribbon  $0.30/each centerpiece
Misc. Flowers                                  $2.00 Dollar Tree
Flat styrofoam piece                       $1.00 Dollar Tree

Step One:


Paint the styrofoam black.  I discovered that spray paint makes the styrofoam disintegrate.  If you have any tips regarding that please share with the rest of us:)  So I just used craft paint and a paint brush.

Step Two:
I used tooth picks to attach the small balls to the larger one using hot glue on each end.  Then did the same thing to attach Minnie Mouse to the base.  You could use heavy cardboard or anything you had for the base.

Step Three:
Then glue miscellaneous flowers around the base to cover it.  I just used dollar tree flowers in coordinating colors.

HERE is the finished result along with a pic of Payton watching mommy.  She's even got her minnie mouse nightgown on:)
 

Happy Crafting:

Linking To:
Show and Tell GreenCreations by Kara